Mellow Mummy: March 2013 : Taking life as it comes...

Sunday, 31 March 2013

Shupeas Adjustable Soft-Soled Shoes Review

pink adjustable shupeas

Shupeas are a really innovative new leather soft-soled shoe for babies and Holly has been trying a pair out.  To me, the instant appeal was that Shupeas grow with your child; one pair is suitable from birth up to about 18 months which means that you don't need to keep buying soft shoes as they grow... it also means that if you buy them as pram shoes when your baby is tiny, you don't feel like you are wasting money if they don't wear them very much until they are toddling.


Holly is always most comfortable around the house and nusery wearing a pair of soft-soled shoes (although now that she is walking, I tend to put her in a harder shoe when we are out of the house); soft leather shoes like Shupeas are much better for a baby foot because they don't restrict growth or movement and allow tiny bones the freedom they need while still keeping little toes warm.

The soles of the Shupeas are leather too but with a simple pattern which is ever so slightly grippy.

The shoe adjusts extremely cleverly through use of a velcro-style fastening as the back of the foot which is hidden beneath the flap of fabric.  I much, much, much prefer this fastening than the more common elastic because it means I can get the fit just right to Holly's foot and know that when I take the shoe off there won't be a horrid red mark from a tight elastic.  At the front of the shoe, the embroidered tab (a gorgeous little flower in Holly's case but the Shupeas range features lots of great motifs for boys and girls) is used to pull the front of the shoe up to make it longer or shorter depending on the style of your child's foot.


For me the Shupea is perfect because we don't use a soft shoe all of the time but I do know mums who use them all day every day and I would worry about whether any shoe is capable of withstanding wear and tear for a whole 18 months of use.

Our Shupeas are some of the very best quality soft shoes I've used with either of my girls and I think the design is very clever indeed.


Minnie Bow-Tique Leapfrog Game Review


Lara plays with her Leapster GS about twice a week (I find it ideal for distracting her while she waits at the side of the pool during Holly's swimming lesson) and last month Lara was one of the first to try out the brand new Disney game from Leapfrog - Minnie's Bow-Tique super Surprise Party.


Minnie's Bow-Tique is available as a cartridge or download for the Leappad (1 or 2), Leapster GS or Leapster Explorer and costs around £20 (which in my eyes is a lot to pay for a children's game, regardless of the educational qualities of the game, or the famous characters it features).


Given the price tag, I was hoping for a lot of entertainment value from Minnie's Bow-Tique and I wasn't disappointed.  Lara has played it a LOT since we downloaded it, sometimes for upto an hour at a time... Lara concentrating on anything for this long is almost unheard of.

I think that the attraction to Lara is the desire to "earn" ribbons for making new bows.  This is something that drives her and she will quite often call to me, wherever I am in the house, beaming with pride for having earned the next colour of ribbon.


Minnie's Bow-Tique Super Surprise Party is designed for children from age 3-5 and is absolutely ideal for Lara right now.  It features three main games - dressing Daisy duck in different outfits (good for younger children still learning colours), sorting out butterfly bows (teaches basic phonics) and a hide-n-seek game for memory.  Throughout all of the screens there are lots of different items to explore and investigate as well as mini games such as bow-making for all Minnie's friends.

Lara's favourite game is sorting out the butterfly bows as it is a challenge.  Bows with pictures of objects flutter over the screen while a voice sounds out the phonics of one of the words.  Your child has to identify the butterfly that matches the word and then drag and drop the correct butterfly bow into a box.  It is quite a challenge for Lara but I think that she will quickly pick it up.  To me, the game would benefit from visible letters as well as the sounds of the words.  I was also a little disappointed in the number of words in one round of the game... the game was very quickly over.

I think that Minnie's Bow-Tique Super Surprise Party is ideal for little girls looking for a good mix between play and gentle learning but I think the price is too high; there isn't enough content to justify the price tag.  If you are thinking of buying this game for your Leapfrog toy then I'd advise purchasing a download card from amazon (where they are quite often on offer) and redeeming it online as this seems to be the most cost-effective way of buying new apps.

Friday, 29 March 2013

Another Prize Winning Easter Bonnet

For two years in a row, my scrumptious little girl Lara has won the Easter bonnet competition at her nursery and has been presented with a prize by the mayor of Wokingham.


Part of me thinks that Lara is now cut out for a career as a milliner; her eye for fashion having developed at such a young age.  But I'm kidding myself.

Lara has won the Easter bonnet competition for a very simple reason... she has made a hat herself out of things she likes to get crafty with at home.  Her hats have been very random, usually with bits of ribbons and stickers and pipe cleaners and pom poms stuck on willy nilly.  But she isn't yet 4 years old... she's allowed to explore her creative side!


This year I was less surprised when I took Lara into nursery than I was last year. I had been prepared this time to see the array of beautiful hand-made hats and bonnets, all perfectly trimmed, coloured and crafted.  Some of them looked amazing but honestly, 80-90% of them had clearly been made my parents, not 3 or 4 year olds.  What is the point in that?  Where's the fun?  All the children who hadn't got the chance to make an Easter hat at home were invited to make a sugar-paper crown at nursery that day.  These very simple sugar-paper crowns made with random bits of tissue paper and paint to me looked so much more fun than the perfectly-formed creations of the other mums and dads.

I will admit that I helped Lara with her hat.  I helped her collect twigs in the garden, helped her to put the hair-band in to place (that was my idea... Lara was quite happy balancing it on her head).  I helped Lara with the glueing... but mainly because I don't trust her with a bottle of PVA! But Lara did all the cutting of ribbons and twigs.  She chose the eggs she wanted, and where she wanted them.  Lara said that she wanted stickers all over the base of her hat and, if we had had more time she would have painted her nest in a fine array of colours.  Lara was the boss.  And why not?


Lara's prize-winning bonnet won her a chocolate easter egg (handy because we hadn't been planning on buying her one) and a photo op. with the mayor of Wokingham which apparently brought her to tears!!!

Monday, 25 March 2013

Cooking With Children :: Raspberry and Apple Hot Cross Buns Recipe

Last weekend I spent the afternoon in the kitchen with both Lara AND Holly cooking an easter favourite - Hot Cross Buns - but with a bit of a twist. To be honest, I'm not a big fan of mixed peel and neither is Lara so, with a little inspiration from the people at Ribena Plus (who asked me to dream up an exciting easter recipe), I invented these fruity buns which still look very traditional but which taste totally fresh and exciting.

Raspberry and Apple Hot Cross Buns


Raspberry and Apple Ribena Plus Hot Cross Buns

Makes 6
Preparation time: 2 hours 15 minutes
Cooking Time: 15 minutes

INGREDIENTS

For the crosses:
10g cold unsalted butter
15g plain flour
8g caster sugar
1 teaspoon undiluted Ribena Plus Raspberry and Apple

For the buns:
350g strong white bread flour
30g caster sugar
1/2 of a 7g packet of fast-action yeast
1/2 teaspoon salt
1/2 teaspoon ground mixed spice
1/2 teaspoon ground cinnamon
1/4 teaspoon ground nutmeg
75ml warm milk
50ml undiluted Ribena Plus Raspberry and Apple
30g unsalted butter which has been melted and then cooled
1 small egg, beaten
100g fresh raspberries
1 medium-sized eating apple
1 knob of unsalted butter
sunflower oil for greasing

For the glaze:
2 tablespoons caster sugar
1 teaspoon undiluted Ribena Plus Raspberry and Apple
2 tablespoons water

METHOD
1. First make a shortcrust pastry for the crosses. Rub the butter, flour and sugar together with your fingertips to make a fine bread-crumb-like mixture. Add just enough of the Ribena Plus Raspberry and Apple to bring the mixture together to form a dough. Chill in the fridge for later.

2. Peel and core the apple and slice it into small pieces about 1cm cubed. Melt the knob of butter in a small pan and then gently heat the apple pieces until they soften and just begin to colour. Remove from the heat and allow to cool.

3. In a large mixing bowl, combine 250g of the bread flour along with the caster sugar, yeast, salt, mixed spice, cinnamon and nutmeg.

4. Make a well in the middle of the mixture and add the warm milk and the Ribena Plus Rasberry and Apple. Stir gently before adding the egg and the melted butter. Stir until it just starts to come together to form a dough.

5. Add the cooled apple pieces and the whole raspberries and then use your hands to combine the fruit into the dough. The bread dough will become very sticky and very pink!

6. Once combined, place the rest of the flour on a clean work surface and then place the dough into the flour. Carefully knead the dough for at least 5 minutes. The dough will take on all of the extra bread flour and may even need a little extra flour to prevent the dough from sticking.

7. Once the bread dough is bouncy and elastic, place it into a large clean bowl that has been greased with a little oil. Cover with a piece of cling film and then place the bowl somewhere warm (we use the airing cupboard) to rise for at least 1.5 hours until doubled in size.

8. Once the dough has risen, knead it again to remove any large air bubbles and then break it up into six pieces. Roll the pieces to form round buns and then place on a greased baking tray.

9. Roll out the chilled shortcrust pastry until it is about 4mm thick. Cut it into 12 slices of about 1cm wide. Brush the tops of the buns with a little water and then stick the pastry strips to the top of each bun in a cross. Trim the pastry at the sides and tuck the edges underneath the buns to make them neat and tidy.

10. Return the buns to their warm place to rise for another 30 minutes.


11. Meanwhile, heat the oven to 200 degrees centigrade.

12. Bake the buns for 15 minutes and while they are cooking, make the glaze.

13. Make the glaze by placing the sugar, water and Ribena Plus Raspberry and Apple into a small pan and warming it over a small heat until the sugar has fully dissolved.

14. As soon as the buns come out of the oven, place them on a cooling rack and brush each of them with a good coating of the glaze to give them a shiny glow.

15. Serve warm.


Sunday, 24 March 2013

Personally Presented Personalised Baby Tracksuit Review


Holly has always had the nickname, Da'Wheez, due to the fact that Lara mis-heard Holly's middle name when we first introduced her to her baby sister (Holly Louise). In her new personalised tracksuit from personallypresented.com, Holly looks very hip, almost gangster - Da'Wheez is in the house.

Joking aside, Holly's new personalised hooded tracksuit is awesomely snuggly and she is totally at home in it. Comfy... as a tracksuit should be.


Holly's tracksuit came from a new online personalised baby gift brand, Personally Presented. PersonallyPresented.com make personalised baby gifts such as bibs, taggy toys, bears, sleepwear and clothing. Holly tried out their hooded tracksuit which is available in pink, grey or blue for £25 including personalisation. The tracksuit is available for babies aged 3 months to 18 months.

I got to choose the text and font for the writing on both the front and back of Holly's hoodie. The tracksuit arrived beautifully wrapped in tissue paper, encases in a thin purple drawstring bag - it would make a beautiful gift for someone.


The very first thing that I noticed about the tracksuit was the quality. Often, personalised products can be very poor quality but this is totally different. It is a cotton, polyester mix and is sourced ethically using fair trade principles from a co-operative in Tanzania. The fabric also hold skincare certifications to ensure that it does not irritate tiny baby skin. To me these things make a difference.


PersonallyPresented.com are offering Mellow Mummy readers a 15% discount if you use the code Baby15 at the checkout. We love our tracksuit and in fact my only complaint is that they don't make them in bigger sizes as well because Lara wants one (and so do all of their older cousins!).

Rug Doctor Carpet and Upholstery Cleaning Review

Holly is mobile and that means that I have a line of snot and dribble around the entire living room at exactly Holly's height.  Ick.  So when Rug Doctor challenged me to give their upholstery cleaning solution a try, I thought it was perfect timing.

ick!  Toddler snot and half-chewed biscuit.


Rug Doctor loaned me one of their carpet and upholstery cleaning machines which you can normal find for rental in supermarkets, dry cleaners and sometimes hardware stores.  They also sent me some of the Rug Doctor upholstery cleaning solution which is best used with some of their anti-foam solution as it tends to froth inside the machine a lot more than the carpet cleaner does.

The upholstery cleaner came as an attachment which was very easy to put onto the machine.  I filled up the bottom reservoir with hot water mixed with the upholstery cleaner and then used the hand-held vacuum over my sofas and curtains by squeezing the trigger to release some of the water mixture and then sucking it up with the brush-head.


For me, the difference was instantly noticeable.  I have risked putting my sofa covers through the wash in the past (when we were potty training Lara) but obviously it is impossible to put the arms of the sofa or the sofa base through the wash and they looked instantly improved.  The vaccuum left the sofa arms quite dry (just a little moist to the touch) but by the time I got back from work in the evening they were completely dry and looking spotless.  I will definitely be doing this again in the future as I think it has given my sofa a new lease of life... we had been previously considering replacing the sofa but it just seems such a waste when we KNOW we have another period of potty training and crayons and felt-tips to get through in the future.  Being able to fully clean the sofa means that we can make our sofa stay looking good for a few more years.

after cleaning with Rug Doctor upholstery cleaner


As we had the Rug Doctor machine with us, we decided to treat and clean the carpets throughout the house.  We were already fans of the Rug Doctor urine eliminator from our potty training trials but we were also sent a bottle of the carpet detergent with spot blok which coats the carpet and protects it from staining in the future.

I will honestly say that the Rug Doctor is the most effective cleaning machine I have ever tried (and very easy to use despite being incredibly heavy) and that the Rug Doctor carpet detergent was a LOT more effective at cleaning our cream carpets than my existing detergent although I think it would be even more impressive if I had pre-treated the carpet with Rug Doctor's Trafflic Lane treatment.  One evening I cleaned the living room carpet and ran out of liquid in the machine with just one small area of carpet left to clean... I decided not to both cleaning it and tidied up for the night.  The next morning I came downstairs and instantly noticed that the piece of uncleaned carpet looked black in comparison to the rest of the nice clean carpet!

clean at the top, dirty at the bottom!


I have enjoyed using the Rug Doctor.  It is a lot more effective than my own small carpet cleaner and I think that for occasional use it is good value.  I will probably continue to use my own small cleaner in between more serious 'spring cleans' using the Rug Doctor.

Thursday, 21 March 2013

Holly's Smart Trike

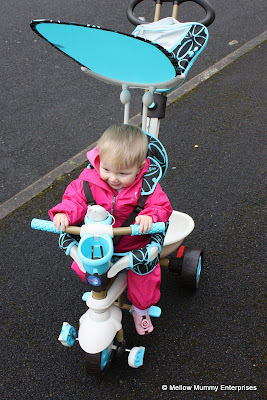
This weekend we unpacked and constructed Holly's brand new Smart Trike with Dream Touch Steering.

Our first outing in the Smart Trike Dream


Unpacking the Smart Trike Dream


I am planning a full review of the 4-in-1 Smart Trike Dream in the coming weeks but let me tell you this... it was dead easy to put together (Lara barked the instructions at her Daddy!) and it is incredibly easy to put Holly in and out of, and to push and steer along the pavements around our house.

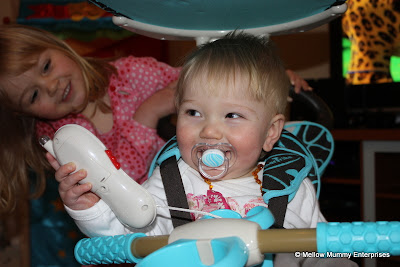
I'm not 100% convinced about the lessons being taught through the introduction of a built-in 'mobile phone' for toddlers but actually this was the part of the Smart Trike dream that Holly loved most.  We went out for our first adventure on the Smart Trike Dream with Holly on the trike and Lara on her balance bike!  Holly grinned from ear to ear for the entire journey.  I really, really wish she could have told me what she was thinking because she just looks as if she had discovered the meaning of life!  I'm so glad she enjoyed herself.

Grinning from ear-to-ear on the Smart Trike Dream

Integrated moblie phone on the Smart Trike Dream???

We are using our Smart Trike 4-in-1 in its first mode which is suitable for 10 months upwards.  At this age we just push Holly along and she has no control over the steering.  As she grows, the Smart Trike will grow with her and I'm hoping to share our journey with the Smart Trike Dream over the coming year.  As Holly gains more control we will allow her to control the steering, then slowly remove the supports and the steering control so that eventually, as she approaches 3 years old, she will be able to use the trike all on her own with no support.  Yay!

Disclosure:  Holly was sent the Smart Trike Dream to review as part of an ongoing series of blog posts and competitions in the coming months.  We love it but would tell you honestly if we didn't.

Tuesday, 19 March 2013

Holly's First Shoes

Holly is walking confidently now all around the house and at nursery and so we decided that it was time for her first pair of shoes. I had been hoping to put off the purchase of her first pair of shoes for as long as possible as I know that tiny feet are better left shoe-less to allow their foot bones to develop properly but the fact is that Holly, at 10 and a half months, wants to be walking everywhere.

Around the house we usually leave Holly barefoot and if we are going somewhere in the buggy, or visiting somewhere indoors and I want to keep her feet warm and protected then I put her in a pair of soft-soled shoes. But out and about, I felt she needed a pair of smart shoes to wear.


We took Holly to our local Clarks store first thing on a Saturday morning (to avoid the rush!) and let the girls loose. Holly had her feet measured; they were ever so slightly smaller than Lara's first shoes were but then Lara was 14 months old by then). Holly found the whole experience fascinating; she tightened her toes when the shoes went on which made it very hard to fasten them. Then she chased her big sister around the store.

You can tell from her smile that she was having fun.

Holly came away with a personalised height chart too!

Monday, 18 March 2013

Lara's First Big Girl Bedding - Yorkshire Linen


Yorkshire Linen really got their timing right when they asked us to review some of their children's bedding range. A short while ago Lara moved out of her cotbed and into a full-sized adult single bed so we needed to choose her some new bedding.

Yorkshire Linen had a wide range of character bedding but Lara has a lot of character toys and ornaments and I thought maybe that the move to a big girl's bed was an opportunity for her to try a more grown-up yet still extremely girly duvet cover set. Between us we chose this Nelly Duvet Cover Single Set which is predominantly pink but with blues, greens, oranges and greens as well.

I had half been expecting Lara to be disappointed that we hadn't chosen her a character cover but in fact, the design went down a storm with her. Lara has actually requested that her Nelly duvet cover be put on her bed in preference to other designs - now that's what I call success.


The Yorkshire Linen duvet cover set is fully machine washable and can be cool tumbled. It is very soft and falls nicely on the bed. I think the thing I love most about it (other than that to me it signals that Lara is growing up) is that on the reverse of the pillow there is a really vibrant pink flower design that looks really bold and works so well with the white in the rest of the cover. We match the Nelly duvet cover set with a plain white sheet.

I think the thing I've proven to myself over the past few weeks is that just because character products make Lara incredibly happy, doesn't mean that non-branded products won't make her smile even more so!

Sunday, 17 March 2013

Puckababy Sleeping Bag and Wrap Review


This little pixie is in fact Holly escaping from me in her Puckababy GoGo babywrapper!  The Puckababy GoGo is an extremely snuggly piece of kit designed to keep your baby warm at home AND out of the house.  It has little slits in the back which allow you to pass through the straps of a buggy or car seat; i've seen and tried a lot of products which claim to allow you to use them seamlessly with an infant car seat (some good, some bad) but the GoGo is the first one that I have felt could actually work on a daily basis.

To put your baby into the GoGo you lie them into the babywrap, slip their feet into the two foot areas and then you wrap them up.  There are velcro-style pads which mean that the internal and external flaps won't open easily but as you can see, Holly is just a bit too mobile for it now and does manage to get her arms to escape!  The Puckababy GoGo is available in two sizes.  This one is really designed for babies from newborn upto 7 months but Puckababy sell a similar item (a little bit more like a fleecy cloak) for kids age 9 months through to toddlerhood.


Holly found the Puckababy GoGo to be very comfy and she enjoyed being in it, especially in the buggy.  For me it is a little too warm for use around the house but is perfect for use in the car and in the pushchair.


The Puckababy Original is a cross between a baby sleeping bag and a newborn swaddle.  Holly tried out the Puckababy Original Mini which is really designed for babies between 3 and 6 months which is why she more or less fills it.


The Original sleeping bag by Puckababy comes in a good range of colours - this one is a white and silver design made from 100% organic cotton.  The sleeping bag has an insert that you place over your baby's arms a bit like a cardigan, you can then wrap this part around your baby's arms.  You zip the sleeping bag down  in the inverse direction to 'normal' so that the zip is out of the way of their face and chin.

The ingenious part of the Puckababy Original sleeping bag is that you can use it like we have in the picture in the form of a swaddle to keep baby wrapped up tight and feeling secure... OR there are flaps over each shoulder that you can unzip and then slip their arms through so that it looks and acts more like a traditional sleeping bag.  This is ideal for if you are struggling to transition your baby away from a swaddle as it keeps them comfortable in a sleeping bag with which they are familiar.

I felt that the quality of both the Puckababy GoGo and the Puckababy Original were EXTREMELY good, possibly the best baby sleeping bags I've come across and I would be more than happy to send or receive these as baby gifts.

I would say that the Puckababy Original had a couple of features which I could have done without... the pocket on the front of the sleeping bag seemed a bit unecessary for instance!  The Puckababy Original also requires you to tie the sleeping bag up at the base to ensure that there is no flapping loose fabric at the bottom, this seemed like an extra step that would be tricky if you were trying to settle a restless baby to sleep.

Despite this, I think the fact that the Original Sleeping bag is also a very effective swaddling bag makes it a perfect first sleeping bag.  The GoGo costs around £47.95 and the Original Mini costs around £42.95.


John Frieda Everlasting Blonde Colour Preserving Shampoo and Conditioner Review

Three weeks ago I had my highlights done for the first time since Holly was born and my goodness it felt good. Not only did I get over 3 hours baby-free on a Saturday but I came out of my salon with a fresh blonde head of hair that made me feel ready for spring!

John Frieda sent me some of their new Everlasting Blonde Colour Preserving Shampoo and Everlasting Blonde Colour Preserving Conditioner to try out on my freshly blonded hair!

I would say that past experience has told me that it is hard to find a shampoo that keeps my colour looking fabulous and within the first few washes after getting my highlights done I notice a big difference in the brightness of colour. The John Frieda Colour Preserving products seem to have slowed that process and although it doesn't look like I'm fresh out of the salon, I am definitely impressed at how bright my highlights still seem several weeks on.

The very first time I used the shampoo I noticed instantly that it seemed to cope well with my notoriously tangly hair, especially given that hair can be very troublesome and dry after a full head of highlights. The shampoo felt good and didn't tangle my hair. The conditioner was even better. It doesn't feel heavy on my hair but it does seem to assist in the de-tangling (I'm always suspicious of a conditioner that eliminates my tangles!!!

I like the fact that the Everlasting Blonde products come in great big 250ml bottles as my hair is getting pretty long now and needs a lot of attention regularly.  You can also buy it in a smaller 50ml bottle too.

The scent of both the John Frieda shampoo and conditioner is delicate and almost imperceptible.  There are natural oils included on the ingredients list (safflower and bergamot) but I think there is a lot of man-made stuff too.

Wednesday, 13 March 2013

Easter Preparations with Eggnogg and ASDA

Lara and I really started getting into the Easter spirit this weekend.  This year Easter falls on the last weekend in March and so Lara and I spent our weekend practicing baking and doing lots of craft and colouring activities with thanks to Eggnogg and ASDA.


Lara was sent a truely awesome Easter tablecloth from Eggnogg.co.uk who make colour-in crafts and accessories for kids.  The very second that I laid down our paper table cloth, Lara got to work colouring in the rabbits, eggs, spring flowers, birds and cows of all different shapes and sizes.  There is so much detail to the colour-in tablecloth that Lara could be entertained for the whole of the rest of the month!  Eggnogg also have colour-in Easter eggs, a treasure hunt and Easter bunting as part of their Easter Extravaganza.  To me, Eggnogg is such a great find and I can't wait to go back to them for some birthday bits and pieces later in the year.

On Sunday Lara went to visit a friend for tea and she was eager to make some cakes as a gift to take with her - what a great reason to crack open some of the Easter decorations and baking accessories from ASDA?


Lara and I melted chocolate over a pan of water, mixed in some golden syrup and butter and then stirred it into some crispy rice.  We spooned the chocolatey mixture into brightly coloured Easter cupcake cases from ASDA (we have matching napkins and plates too!) and then decorated our chocolatey Easter nests with mini chocolate eggs and rabbit-shaped cake toppers.

Needless to say that the Easter nests went down EXTREMELY well with Lara's little friend!

Tuesday, 12 March 2013

Phonics learning with the Alphablocks

Earlier this week my Alphablocks DVD competition closed (I'll be posting the winners soon) but today I wanted to share our thoughts on the very first Alphablocks DVD.

We only started watching Alphablocks on CBeebies a little while ago when Lara first started learning basic phonics at nursery; Lara instantly took to it and quite regularly requests to watch her new DVD. The DVD has 18 episodes on it, starting with a basic introduction to the phonics letter sounds. The episodes are short and easily digestible.

Each episode features one or more of the letter blocks as the focus. As the blocks travel through their little world they meet other letters and every time the letters hold hands, they make a word. The sounds of the letters are sounded out individually by the blocks and then the word is repeated.

Both myself and Mr. B enjoy watching Lara when she is absorbed in the Alphablocks. I hear her making the sounds of the letters and saying the words. I can also see that little glint of recognition when she notices a pattern in some words. I've always said that watching Lara learn is one of the most rewarding parts of being a parent and when she is watching Alphablocks I get that tingly feeling. Lara doesn't realise she's learning because she is enjoying the programme.

The new DVD comes with a parents guide AND a free Alphablocks alphabet poster. Lara, very surprisingly, seemed uninterested in her poster but I really think this is because she is sooooo interested in the DVD. She more or less ripped open the packaging which is wonderful to see for a programme with such strong educational background behind it.

So far, I think Lara's favourite episode features the "e" noise.  The E alphablock has quite a strong female (?) character and many of the words that feature the "e" sound are ones that Lara can recognise and repeat herself.  Interestingly though, Lara tends to struggle with reading the letter e (in comparison to the other vowel sounds) so I'm really hoping that watching the Alphablocks can help her with this.

You can find out more about the new DVD at www.alphablocks.tv .


Sunday, 10 March 2013

Fairtrade baby loveliness from Organic Monkey

Today marks the end of Fairtrade fortnight and to celebrate, Holly and I have been using some of the gorgeous products from Organic Monkey who specialise in fairtrade and organic skincare products for babies.


As big fans of the Organic Monkey cheek rub oil we were excited to try out some of the other fairtrade and organic products. I was all the more excited when I realised that their signature baby massage oil is called "Hello Mellow Organic Massage Oil" !

These days Holly doesn't often stay still for long enough for me to massage her but occasionally when she is in the right mood to zone out I do still perform a little baby massage on her legs, chest and arms.  This massage oil is a beautiful scent (although Organic Monkey do also make an unscented version) which is an uplifting mix of citrus with soothing chamomile and lavender.  I found the mix of the oil to be quite light which means it is very easy to apply and you don't need to use very much of it.  I thought the introduction of sweet orange oil was a great idea as it makes the scent that little bit out of the ordinary.  All of the base ingredients that are farmed to make Organic Monkey's balms and oils are bought through fairtrade arrangements.


We also tried out the Organic Monkey Bumfluff Nappy Balm.  The blend of oils is quite similar, but without the citrus zing.  The balm is made with a mix of essential oils and fairly-traded shea butter to help smooth and soften skin and is intended to prevent the conditions which encourage nappy rash.  Holly suffers immensely from nappy rash so we tend to use a lot of nappy balm as a preventative measure.  I would say that this balm  didn't seem to prevent the rash but once it was there, it definitely soothed.  Holly is beginning to be able to communicate with me and it is very clear when the nappy rash causes her pain... with the bumfluff balm she seems happy and comfortable.  The nappy balm is very very light and once again you just need a thin film of it - I use the balm all over the bottom, not just in the areas which suffer from redness.

Kärcher Steam Cleaner Review

I'm not a clean freak (you would know this if you had ever met me!) but since the Kärcher Steam Cleaner came into my life, I've certainly found a lot more enjoyment in my weekly cleaning flourish!  I was asked by Kärcher to review one of their Steam Cleaners from a parent's point of view.

There is something very satisfying about blasting dirt away.  Especially when it is dirt that has been sitting there teasing and taunting you for many years.  Having blasted my way through the kitchen with the steam cleaner one rainy Sunday afternoon, my kitchen was almost unrecognisable.  You know the really gunky bit by the side of the dishwasher where all the dribbles of tea and food collect?.. totally spotless.  You know the gungy bit at the back of the cooker and the oily bits on the outside of the cooker hood?.. totally spotless. If you've ever owned a cat... you know the bit of plastic around the outside of the catflap that collects general purpose yuck combined with a layer of cat hair that normally won't budge?.. totally spotless.  With a gadget such as this, I could actually get to enjoy cleaning!!!

For me, there are two big attractions to the steam cleaner beyond it's ability to shift hard-to-clean dirt.  The first is that it doesn't require me to use chemicals which makes me feel better about my impact on the world; the steam cleaner simply uses a jet of steam which you can focus using different sizes of brush head.  The second big attraction is that a steam cleaner can help to remove known allergens such as dust mites and pollen and you can use the steam cleaner to freshen up fabrics and use the power of the steam to get rid of nasties from materials you probably wouldn't be able to put through the washing machine - the curtains, sofa covers and the girls' mattresses.
The highchair BEFORE

The two places where I have found the Kärcher steam cleaner to be most effective are on removing stains such as limescale and toothpaste from the bathroom sinks and.... and this is the best... Holly's highchair.

Our highchair has lasted three years now but I normally find it astonishingly hard to clean.  On every single joint there was three years worth of baby food that I hadn't even been able to flush out with an old toothbrush.  Every couple of weeks I remove all the padding and covers from the highchair and try to remove the dried-on food but I had never quite managed to get it clean until I started using the steam cleaner.  The steam cleaner makes light work of it - blast, blast, blast and within about 2 minutes it looks as good as new.  Who would have thought that a steam cleaner would become my number 1 weaning aid?  I also find that with one of the soft terry cloth covers over the floor-cleaning head, that I can clean up the floor beneath the highchair in a matter of seconds as well.

The highchair AFTER - much more hygienic!


The entry level Kärcher SC 1.020 Steam Cleaner costs around £129.99 and the SC 2.500 C costs around £219.99 and I think I've already got more value from it than many of the other cleaning gadgets I've ever owned.


Related Posts with Thumbnails